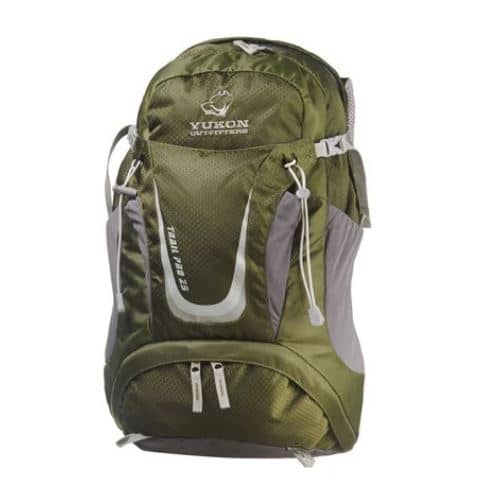
Quick answer: to pack a hiking backpack, put light, bulky items you will not need until camp at the bottom, heavy items in the middle close to your back, and things you need during the day at the top and in the pockets. Keep the load balanced side to side, compress it so nothing shifts, and keep rain gear, water, snacks, map and first-aid kit within easy reach. Then fit the pack: hip belt first, shoulder straps second.
How we put this together: this is standard packing practice, combined with published fitting and checklist advice from hiking organisations, linked in the text. Weight figures are general guides, so adjust them to your fitness and the trip.
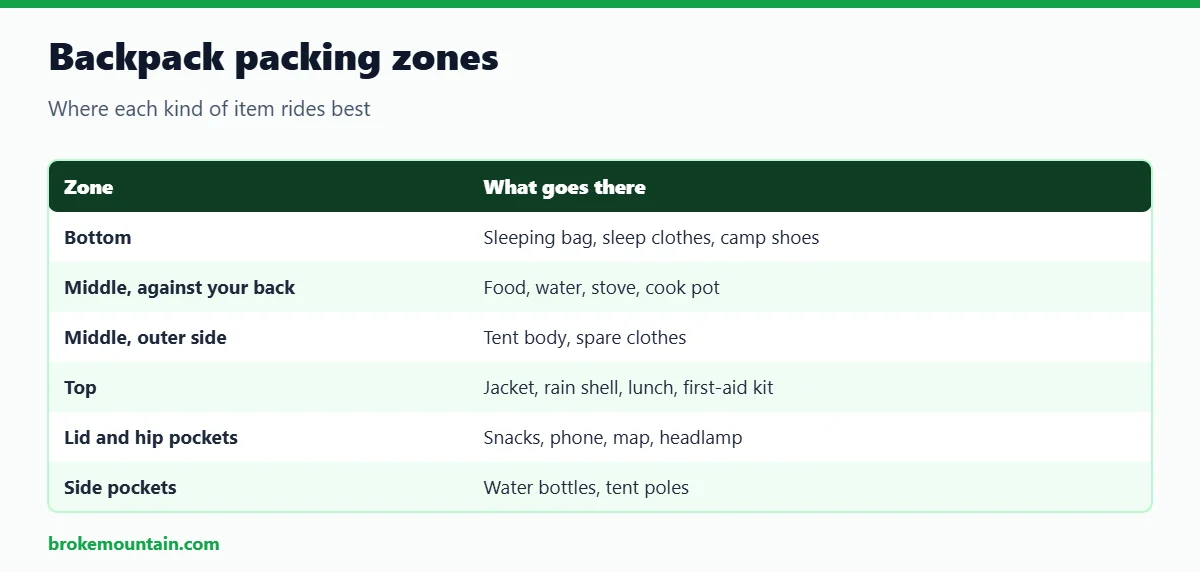
How to pack a hiking backpack: the zones
| Zone | What goes there | Why |
|---|---|---|
| Bottom | Sleeping bag, sleep clothes, camp shoes | Light, bulky, not needed until camp |
| Middle, against your back | Food, water reservoir, stove, cook pot, bear canister | Heavy items ride best close to your spine |
| Middle, outer side | Tent body, spare clothes | Medium weight; fills the space around heavy items |
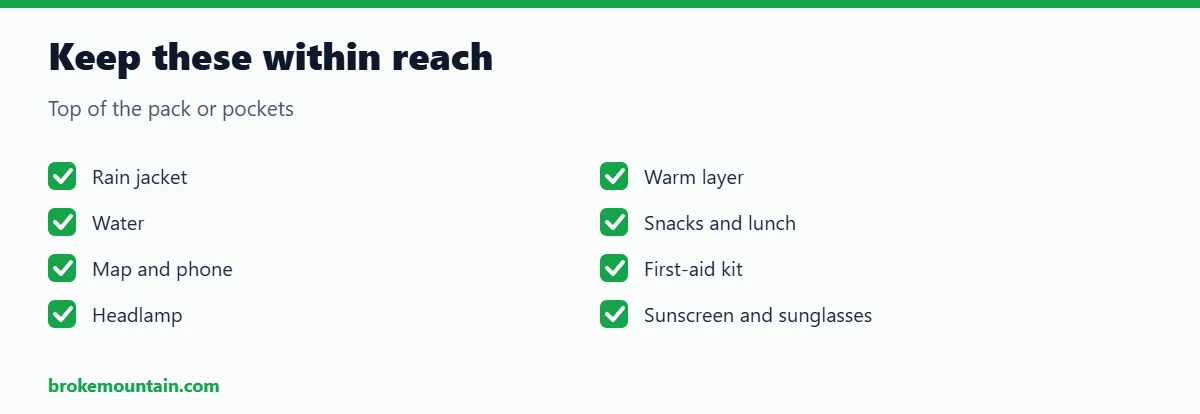
| Top | Insulating jacket, rain jacket, lunch, first-aid kit | Reached quickly without unpacking |
| Lid and hip-belt pockets | Snacks, phone, map, sunscreen, headlamp, knife | Used many times a day |
| Side pockets | Water bottles, tent poles, trekking poles | Long or frequently used items |
| Outside straps | Sleeping pad, wet tent fly, sandals | Only what will not fit or must dry |
Before you pack
- Lay everything out. Seeing it all at once shows duplicates and gaps.
- Check it against a list. The National Park Service’s Ten Essentials cover navigation, sun protection, insulation, light, first aid, fire, repair tools, food, water and emergency shelter. See our full checklist of what to bring hiking.
- Remove what you will not use. Every item should earn its place; see how to lighten your pack.
- Group small items in a few coloured stuff sacks or zip bags: kitchen, clothes, toiletries, electronics.
- Line the pack. A pack liner or a strong rubbish bag inside the main compartment keeps contents dry more reliably than a rain cover alone.
Step by step: packing a multi-day pack
- Bottom: stuff the sleeping bag into the base, in its liner. Add sleep clothes and anything else for camp only.
- Core: place the heaviest items, usually food and water, in the middle of the pack against the back panel, between your shoulder blades and the small of your back.
- Fill around the core: wrap the tent body, spare clothes and soft items around the heavy things so they cannot shift.
- Top: jacket, rain shell, lunch and first-aid kit.
- Pockets: snacks, map, phone, headlamp, sunscreen, water treatment.
- Outside: as little as possible. Strap long items vertically and tight.
- Compress: tighten the side straps so the load is firm and close to your back.
- Check the balance: stand the pack up. If it falls to one side, move something.
How to pack a daypack
A daypack has less in it, and the same rules apply.
- Water reservoir or bottles against your back or in side pockets.
- Spare layer and rain jacket in the main compartment.
- Lunch on top of the layers.
- First-aid kit, headlamp and emergency blanket in an inner pocket, always in the same place.
- Snacks, phone, map and sunscreen in the top or hip pockets.
REI’s day hiking checklist suggests a pack of about 10 to 20 litres for short, simple hikes and a larger one for longer days. See our picks for daypacks under $100.
Where should the heavy items go?
In the middle of the pack, high enough to sit between your shoulder blades and hips, and as close to your back as possible. Weight carried there acts through your hips. Weight carried low makes the pack sag; weight carried far from your back pulls you backwards; weight carried very high makes you top-heavy on rough ground.
For scrambling or off-trail walking, pack heavy items slightly lower for stability.
How heavy should your pack be?
| Trip | Common guideline | Example for a 150 lb hiker |
|---|---|---|
| Day hike | Up to about 10 percent of body weight | Up to 15 lb |
| Multi-day backpacking | Up to about 20 percent of body weight | Up to 30 lb |
These are widely used rules of thumb, not limits. Fit, experienced hikers carry more; beginners are more comfortable with less. Food and water are usually the heaviest things you carry, so plan them carefully; see food when hiking.
Packing for different trips
- Summer day hike: water takes most of the weight. Carry it against your back and keep sun protection in a pocket.
- Winter day hike: spare insulation fills the pack. Keep gloves, hat and a warm layer at the very top, and a hot drink where it will not leak onto them.
- Weekend backpacking: the food bag is your heaviest item on day one. Centre it against your back and repack as it shrinks.
- Bear country: a canister goes upright in the middle of the pack, with soft items packed around it; see bear canisters and bear bags.
- Wet forecasts: use the liner, and keep the rain jacket and pack cover on top.
Keeping things dry
- Pack liner inside, rain cover outside for heavy rain.
- Sleeping bag and spare clothes in their own dry bags.
- Phone, map and matches in zip bags.
- Wet tent fly outside the liner, or strapped outside the pack.
Fit the pack after you load it
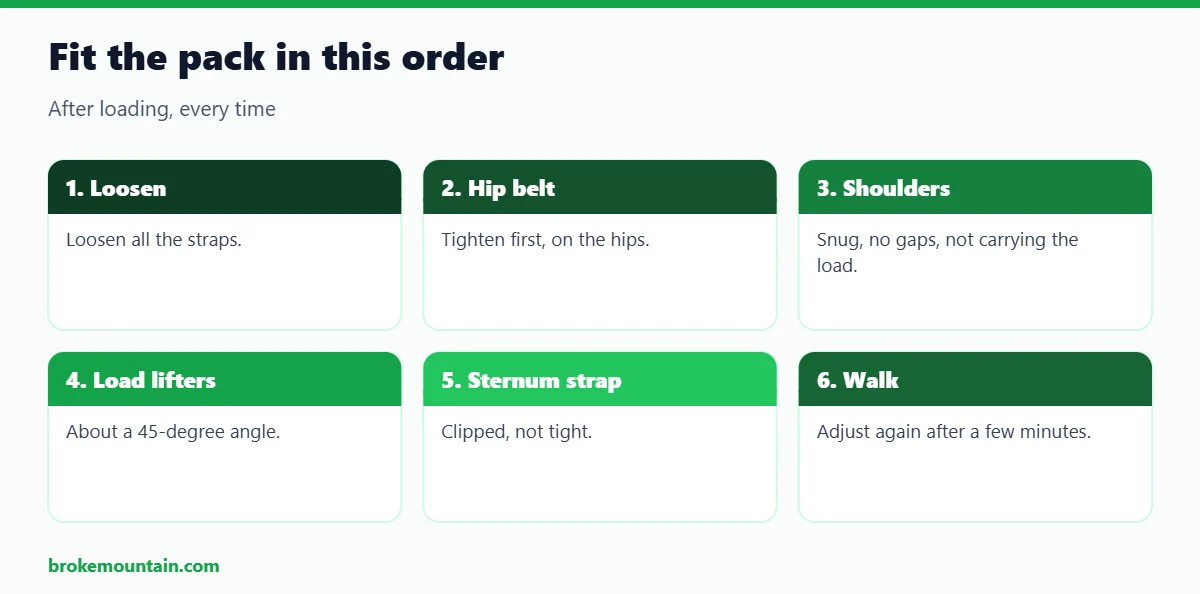
The American Hiking Society gives this order:
- Loosen all the straps.
- Tighten the hip belt first, with the belt on your hips, not above them.
- Tighten the shoulder straps until the padded part follows your shoulders with no gaps. They hold the pack close; they should not carry most of the weight.
- Adjust the load lifters to about a 45-degree angle.
- Clip the sternum strap, not tight. It only keeps the shoulder straps in place.
Walk a few minutes and adjust again. Loosen and re-tighten during the day as the load changes.
How to pack a hiking backpack: common mistakes
- Heavy items at the bottom or the top.
- Rain jacket buried under everything.
- Gear hanging and swinging from the outside.
- More weight on one side than the other.
- Loose, half-empty pack with nothing compressed.
- Packing “just in case” clothes for every possible day.
- Fuel bottle next to food. Keep fuel upright, below and apart from food.
Packing tips that save time on the trail
- Pack the same way every time so you can find things in the dark.
- Keep the headlamp and first-aid kit in fixed places.
- Put the day’s snacks in a hip pocket each morning.
- Pack the tent last in the morning if it is wet, so it can go outside the liner.
- Use a hydration bladder if you forget to drink; see hydration bladders.
Frequently asked questions
Where do heavy items go in a hiking backpack?
In the middle of the pack, close to your back, between your shoulder blades and hips.
What goes at the bottom of a backpack?
Light, bulky things you only need at camp, such as the sleeping bag and sleep clothes.
How much should a hiking backpack weigh?
A common guide is up to about 10 percent of your body weight for a day hike and 20 percent for backpacking.
Should I strap gear to the outside of my pack?
As little as possible. Outside items snag, swing and get wet. A sleeping pad and a wet tent fly are reasonable exceptions.
How do I keep my backpack dry inside?
Use a waterproof pack liner, with key items in their own dry bags. Add a rain cover in heavy rain.
Last checked: November 2026.

Hi, I am Emam Hasan — founder and editor of BrokeMountain. I oversee this blog’s hiking, camping and outdoor gear guides, making sure every article is well-researched, accurate and genuinely helpful for your time on the trail. Enjoy it!