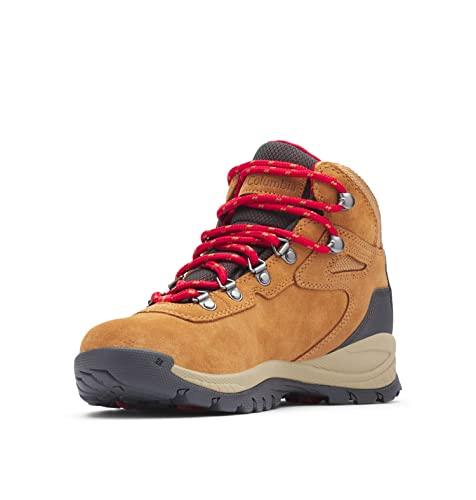
Hiking boots are the most important piece of gear for any outdoor lover. They give your ankles support, grip the ground well, and protect your feet on rough trails. But rain, wet grass, mud, and stream crossings slowly wear away the factory coating on your boots. When water gets into your boots, they grow heavier, your feet get cold, and the extra rubbing leads to painful blisters.
Learning how to waterproof hiking boots the right way is an important skill. It protects the money you spent on your boots, keeps them breathable, and keeps your feet dry and comfortable in harsh weather. Waterproofing is not just spraying one product onto any shoe. You need to understand your boot’s material, choose a product that suits it, and apply it with the right steps, one by one.
This complete guide covers everything you need to know about waterproofing hiking boots. It explains how to prepare the surface and how to choose top brands like Nikwax, Granger’s, Obenauf’s, and Sno-Seal. It also covers methods for each material, common mistakes, and storage tips. This guide gives you the exact steps to keep your boots working at their best for hundreds of trail miles.
Why Waterproofing Your Hiking Boots Is Essential
Keeping Feet Dry on Wet Trails
Walking for miles with wet feet in soggy boots can ruin an outdoor trip. Wet boot uppers soak up water. This makes your boots much heavier with every step, and your legs get tired much faster on long hikes. Good waterproofing creates a barrier that pushes water away. Water drops bead up and roll off the outer surface instead of soaking into the fabric or leather.
Preventing Blisters, Friction, and Infections
Too much moisture inside a boot softens the skin of your feet. This makes them far more likely to get sore, rubbed, or blistered by sock friction. Damp places inside boots also help bacteria and fungi grow, such as athlete’s foot. This can lead to long-term foot health problems. A reliable waterproof layer keeps moisture out and keeps your feet healthy.
Extending Boot Lifespan and Maintaining Performance
Untreated dirt, mud, and water slowly damage boot materials over time. Dried mud acts like a sponge. It pulls the natural oils out of leather uppers and makes them dry, stiff, and cracked. Fine grit and salt sink deep into synthetic fabric fibers and cut away at the stitching with every step. Regular cleaning and waterproofing protect the uppers from this kind of damage. They can extend the useful life of good hiking boots by 40% to 60%.
Selecting the Right Waterproofing Method for Every Boot Material
Full-Grain Leather Boots
Full-grain leather is loved for its great strength and natural water resistance. But it needs regular conditioning care to stay soft and flexible. Leather uppers need special wax-based treatments, conditioning pastes, or heavy-duty protectors like Dubbin wax or Obenauf’s Heavy Duty LP. These products sink into the tight pores of the leather. They replace the lost tanning oils and seal out moisture at the same time. But you should note that heavy waxes and oil-based protectors will naturally darken smooth leather uppers.
Nubuck and Suede Boots
Nubuck and suede are made by sanding or brushing leather to create a soft, velvety surface. You should never apply heavy waxes, greases, or oils to nubuck or suede. They flatten the soft surface, leave greasy patches, and stain the material for good. Instead, nubuck and suede boots need special, light spray-on proofers. These coat the fibers without changing the surface feel and without hurting breathability.
Synthetic and Fabric Boots
Many modern light hiking boots mix woven synthetic fabrics like nylon, polyester, and mesh with support overlays. Synthetic materials do not absorb heavy oils or waxes. They need special liquid or spray Durable Water Repellent (DWR) products, such as Nikwax Fabric & Leather Proof or silicone-based sprays. These sprays coat each synthetic fiber to stop water from soaking in, while still letting sweat vapor escape from inside.
Waterproof Membrane Boots (Gore-Tex)
Boots with built-in waterproof membranes — such as Gore-Tex, eVent, or a brand’s own liner — use a tiny barrier inside the boot. This barrier stops liquid water from getting in while letting sweat vapor out. For these boots, waterproofing care focuses on the outer upper fabric. You must avoid heavy waxes, silicones, and thick greases on Gore-Tex fabric uppers. They clog the outer breathability pores, trap sweat inside, and make your feet feel damp and clammy. Water-based DWR pump sprays are the right choice for membrane footwear.
Real Waterproofing Products and Brands: What to Choose
Nikwax & Granger’s Technical Care Solutions
Nikwax and Granger’s are leaders in eco-friendly, water-based footwear care. Products like Nikwax Footwear Cleaning Gel safely lift stuck-in dirt without removing the water repellency that is already there. For proofing, Nikwax Waterproofing Wax for Leather conditions full-grain leather uppers. Nikwax Fabric & Leather Proof and Nikwax Nubuck & Suede Proof restore water repellency on technical fabrics, suede, and mixed-material boots. Granger’s offers similar fluoropolymer and water-based spray products made specially for technical footwear.
Traditional Waxes, Oils, and Pastes
Traditional wax and oil products provide heavy-duty protection for rugged full-grain leather footwear:
Beeswax & Sno-Seal: Natural wax treatments that sink deep into leather uppers. They create a long-lasting, strong seal against mud and standing water.
Dubbin Wax: A classic wax made specially for smooth leather. It softens, conditions, and waterproofs dry leather uppers.
Obenauf’s Heavy Duty LP: A famous beeswax and natural oil preservative. It melts with friction and room temperature to protect leather against heavy moisture and salt damage. It greatly extends the life of leather boots.
Silicone Sprays and DWR Coatings
Silicone sprays form a flexible, water-repellent layer on outer boot materials. They are easy to apply, dry fast, and work well on synthetic materials and general outdoor fabrics. However, water-based DWR sprays are still the better option for good breathability, especially when you care for Gore-Tex membrane boots.
Specialized Seam Sealers and Adhesives
Even high-quality boots can start to leak along stitched seams, welt lines, and rubber rand joins where the material bends. Special urethane sealants, such as McNett Gear Aid Seam Grip, Aquaseal, or Freesole, can be painted directly onto outer stitching holes and flex points. Coating these seams creates a seal that water cannot pass. It stops thread rot, protects against wear, and stops soles from coming loose. Shoe Goo is another durable choice for repairing outer sole edges and high-wear areas.
The Step-by-Step Method to Waterproof Hiking Boots
Step 1: Deep Cleaning and Surface Preparation
Waterproofing treatments cannot stick properly to dirty boots. Before you apply any product, you must clean your boots well:
- Remove Laces and Insoles: Take out the shoelaces so you can reach the boot tongue, eyelets, gussets, and hidden folds fully. Remove the inner footbeds so you can clean them separately and let proper air flow inside the boot.
- Brush Off Loose Debris: Use a stiff-bristled brush or a footwear brush to remove dried mud, dirt, and dust from the uppers, eyelets, and sole treads.
- Wash with Specialized Cleaner: Sponge or brush the boot uppers with warm water and a dedicated non-detergent footwear cleaner, such as Nikwax Footwear Cleaning Gel. Avoid harsh household dish soaps or laundry detergents that contain bleach. They break down waterproof coatings and dry out leather.
- Rinse Thoroughly: Rinse all soap residue away with clean, lukewarm water. Dried soap left on the uppers will weaken water repellency.
Step 2: Preparing the Boots (Damp vs. Dry Application)
Pay close attention to the instructions of your waterproofing product. They tell you if the boots should be wet or dry:
For Water-Based Proofers (e.g., Nikwax): Apply the product while the boot uppers are still clean and damp. The water on the damp uppers acts as a primer. It draws the active water-repellent parts deep into the pores of the fabric or leather as it soaks in.
For Solvent-Based Sprays, Beeswax, and Heavy Waxes: Make sure the boots are completely clean and dry before you apply them. Trapped surface moisture stops solvent-based sprays and thick waxes from sticking properly to leather fibers.
Step 3: Applying the Waterproofing Agent
Follow these application guidelines for your product type:
Applying Sprays: Hold the spray can 6 to 12 inches away from the boot surface. Spray an even, generous coat over the whole upper. Pay special attention to high-flex points, stitching lines, and welt seams. Wipe away any extra runs or pools with a clean, damp cloth after a few minutes.
Applying Waxes, Creams, and Oils: Work a small amount of product into smooth leather uppers with a clean cloth, a sponge applicator, or your fingers. Rub gently in small circular motions. Work the wax well into seams, stitching holes, and flex points. If you apply a thick wax like Dubbin or Sno-Seal, gently warming the boot with a hair dryer on low heat can soften the wax. This helps the leather absorb it better.
Step 4: Proper Drying Techniques (Natural Air Drying)
Proper drying is just as important as applying the product:
Air Dry Naturally: Place the treated boots in a well-ventilated, room-temperature place, away from direct sunlight. Allow at least 24 hours for the treatment to cure fully.
Absorb Internal Moisture: Stuff the boots with clean newspaper or microfiber towels to draw moisture out from the inside. Replace damp paper every few hours to speed up the drying inside. Convection-style boot dryers that use gentle, unheated moving air are also safe and effective.
NEVER Use Direct Heat: Keep boots far away from radiators, wood stoves, open fires, and electric heaters. Never use a high-heat hair dryer to force boots dry. Direct heat warps synthetic materials, shrinks and cracks leather, and damages the inner adhesives that hold the soles together.
Step 5: Testing Your Boots for Water Repellency
Once your boots are completely dry, do a simple water bead test. Sprinkle several drops of clean water onto different parts of the boot uppers, including seams and flex points. If the water forms tight, round beads that roll off when you tilt the boot, your waterproofing layer is working. If the water flattens out and darkens the material or soaks into it, apply another light layer of treatment.
Common Waterproofing Mistakes to Avoid
- Applying Product Over Dirty Uppers: Trapping dirt under a waterproofing layer stops proper bonding. It leads to patchy protection and seals abrasive grit into the boot.
- Drying Boots Near Direct Heat: Forcing boots to dry near radiators or hot stoves damages leather fibers for good. It destroys waterproof membranes and causes soles to come loose.
- Using the Wrong Product for the Material: Putting heavy leather wax on suede flattens the nap. Putting oils on Gore-Tex fabric uppers clogs the breathable pores and ruins performance.
- Over-Applying Products: Very thick layers of wax or grease create a sticky residue. This attracts trail dust, reduces breathability by up to 40%, and stops moisture vapor from escaping.
- Skipping Seams and Stitching: Ignoring structural seams, gusset folds, and lace eyelets leaves the most vulnerable entry points unprotected against water.
Testing Waterproofness and Reapplication Frequency
How to Test If Your Boots Need Treatment
You can easily check your boot’s water repellency at home. Sprinkle water over the uppers and watch how the surface behaves:
Active Protection: Water gathers into clear, round beads and rolls off with ease.
DWR Failure: Water droplets spread out, soak into the outer fabric or leather, and cause dark, wet spots.
Internal Leaks: Damp socks or wet footbeds after walking through wet grass or shallow streams are a sign that seam sealing or upper proofing has failed.
Reapplication Frequency
How often you need to re-waterproof depends on trail conditions, weather exposure, and how often you hike:
Occasional Hikers: Reapply waterproofing treatments every 3 to 6 months.
Frequent / Wet-Condition Hikers: In heavy-use seasons with rain, mud, snow, or stream crossings, re-treat boots every 2 to 4 weeks, or after every major trip.
Post-Cleaning Reapplication: Always reapply a waterproofing treatment after you wash your boots well with footwear cleaner. Washing slowly reduces the surface DWR coatings.
Storage and Long-Term Maintenance Tips
Post-Hike Short-Term Cleaning
After every hike, brush off dry mud and grit before you store your boots. Never leave muddy leather boots sitting in a garage or closet. Dried mud will keep drawing moisture and essential oils out of leather uppers, and this causes early cracking.
Ideal Storage Environment
Store your hiking footwear in a climate-controlled place kept between 60°F and 70°F, with relative humidity below 50%. Keep boots away from damp basements, unheated garages, hot attics, and direct sunlight. These conditions cause dry rot, mold growth, and material damage.
Preserving Boot Shape and Structure
When storing boots for extended periods:
Avoid Sealed Plastic Bags: Never store damp or clean boots inside airtight plastic bags or non-breathable containers. They trap leftover moisture and help mold grow.
Use Support: Insert cedar boot trees, shoe shapers, or crumpled acid-free newspaper inside the boots. This absorbs leftover moisture and keeps their shape, and it prevents creasing across flex zones.
Keep Upright: Store boots standing upright in breathable fabric bags or on open shelving. Do not stack heavy gear on top of them.
Frequently Asked Questions (FAQs)
Can you wash waterproof hiking boots in a washing machine?
No, you should never wash hiking boots in a washing machine. Machine washing uses excessive heat, harsh movement, and long soaking. This destroys inner waterproof membranes, breaks down stitching, and ruins sole adhesives. Always hand wash your boots with lukewarm water, a soft brush, and a specialized cleaner.
Can suede and nubuck boots really be waterproofed?
Yes, suede and nubuck boots can be made highly water-resistant with specialized spray-on proofers like Nikwax Nubuck & Suede Proof. Never use traditional waxes, greases, or oils on suede or nubuck. Heavy products stain the material and ruin its velvety nap.
Does waterproof spray affect boot breathability?
When you apply it correctly with proper water-based DWR sprays, breathability is fully maintained. However, too many coats, or non-breathable greases, heavy silicones, or waxes on technical mesh or Gore-Tex uppers, can clog the pores. This can reduce breathability by over 40%.
Should you waterproof brand-new hiking boots right out of the box?
It depends on the manufacturer. Many new boots come with a factory DWR coating, but factory finishes can wear off during shipping or storage. Testing brand-new boots with a few drops of water will tell you if they bead water properly. If the water flattens out, applying a compatible proofer before your first wet hike gives you the best protection.
Why should you never dry hiking boots near a radiator or fireplace?
High heat sources like radiators, fireplaces, ovens, or hot hair dryers make leather uppers shrink, dry out, and crack. Heat also weakens the inner glues and warps synthetic materials. This destroys the structure of your boots. Always air dry boots naturally at room temperature, with newspaper stuffed inside.
What is the difference between waterproof and water-resistant footwear?
Water-resistant footwear has treated uppers that repel light rain or shallow splashes for a short time. But water will get in after long exposure. Waterproof footwear combines surface DWR treatments with sealed seams and an inner waterproof membrane (like Gore-Tex). This prevents water from getting in, even during submersion or heavy downpours.
Can you apply waterproofing treatments to boots while they are wet?
Water-based waterproofing treatments, such as Nikwax, are specially designed to be applied to clean, wet boots. The water helps carry the active repellents into the pores of the material. However, solvent-based sprays, beeswax, and traditional waxes need completely dry boots to stick properly.
Key Takeaways
- Match Product to Material: Full-grain leather needs wax or conditioning creams. Nubuck and suede need dedicated spray-on proofers. Synthetic or Gore-Tex footwear relies on water-based Durable Water Repellent (DWR) sprays.
- Clean Before Treatment: Applying waterproofing over mud, salt, or grit seals contaminants into the boot and stops the treatment from bonding properly.
- Damp Application for Water-Based Proofers: Many modern technical proofers, such as Nikwax, stick best when applied to clean, damp boots. The water acts as a primer and carries the active repellents deep into the surface pores.
- Avoid Direct Heat Sources: Never dry hiking boots near radiators, fireplaces, or with hot hair dryers. High heat cracks leather, warps synthetic parts, and breaks down inner adhesives.
- Inspect and Reapply Regularly: Reapply waterproofing every few months, or whenever water stops beading on the boot’s surface and starts soaking into the material.
Conclusion
Waterproofing your hiking boots is a simple maintenance task that pays off in a big way on the trail. Clean the uppers well. Choose products made for your boot’s specific material — full-grain leather, nubuck, suede, synthetic fabric, or Gore-Tex. Let them dry naturally, away from heat. This creates a strong protective shield against rain, snow, and mud.
Regular inspection, quick reapplication, and proper climate-controlled storage will keep your feet dry. They will prevent painful blisters and make sure your boots stay reliable companions for many adventures ahead.
Pro tip: Before your next major backpacking trip, do a quick water-bead test on your boots. Then you can clean and reproof them ahead of time, and your feet will stay dry no matter what weather the trail brings.
Keep reading
- Can I Wear Hiking Boots in the Rain?
- How to Break in Hiking Boots
- How Should Hiking Boots Fit? 7 Simple Tests for a Perfect Fit

Hi, I am Emam Hasan — founder and editor of BrokeMountain. I oversee this blog’s hiking, camping and outdoor gear guides, making sure every article is well-researched, accurate and genuinely helpful for your time on the trail. Enjoy it!