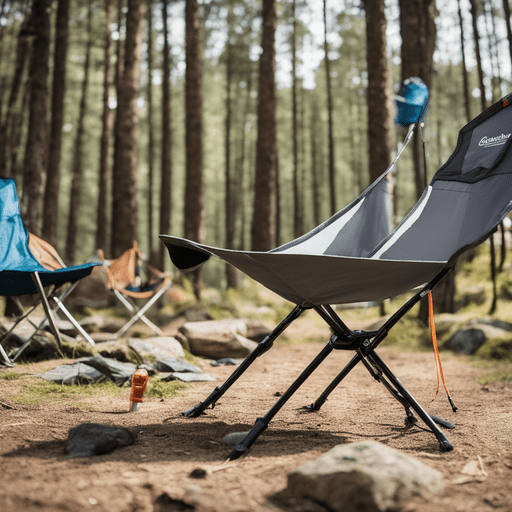
Setting up camp after an active day outdoors is one of the true pleasures of camping. Sitting down around a campfire provides well-earned rest and relaxation. However, that peaceful moment can be quickly ruined by a sudden tilt, an annoying wobble, or a chair leg plunging unexpectedly into soft soil.
The small feet attached to the base of your camping chair play a crucial role in keeping you comfortable and safe in the outdoors. Over time, rough gravel, damp soil, weight pressure, and sun exposure cause these essential components to wear down, crack, or disappear into sticky mud.
Rather than throwing away a comfortable chair when a foot breaks or goes missing, replacing the feet is a practical, cost-effective, and environmentally friendly repair. This guide covers why chair feet matter, how to spot wear, how to select and measure for replacements, and how to install them step by step.

Why Camping Chair Feet Matter for Stability and Safety
Chair feet may seem like minor hardware details, but they perform several vital structural and functional duties:
- Weight distribution: Concentrated weight on thin metal or plastic tubing exerts heavy pressure on the ground. Quality chair feet expand the surface area, spreading the load to prevent legs from sinking into mud, soft earth, damp grass, or sand.
- Anti-slip traction: Wet rocks, slick wooden picnic tables, smooth patio tiles, and uneven campsite terrain require reliable grip. Rubber and textured feet provide friction, preventing the chair legs from sliding out unexpectedly underneath you.
- Protection for chair legs: Open tubular legs easily collect mud, grit, and moisture, leading to internal rust, corrosion, and structural weakness. Foot caps seal leg openings and shield tube ends from abrasive impacts.
- Protection for tent floors and gear: Exposed, sharp metal or hard plastic tube edges can easily slice through tent groundsheets, snag clothing, or tear sleeping pads in storage bags. Smooth, rounded replacement feet keep your other gear safe.
- Extended gear lifespan: Worn feet cause uneven weight distribution, putting excess strain on frame joints and canvas fabric. Maintaining balanced feet prevents bent tubing and frame failure, keeping your favorite gear in service for years.
Clear Signs That Your Chair Feet Need Replacing
Regularly checking your outdoor gear helps prevent unexpected failures at the campsite. Inspect your chair legs for these warning signs:
- Visible structural damage: Look for deep cracks, splits, fraying edges, or severe thinning on the bottom contact surface.
- Missing or loose caps: If a cap slips off easily or was pulled off in heavy mud, the remaining bare leg creates an imbalance.
- Exposed metal or plastic tubing: If the bare frame tube touches the ground directly, replacement is needed right away to avoid damaging the leg or surrounding surfaces.
- Uneven seating and wobbling: Uneven wear on individual feet causes the chair to rock on flat ground, leading to discomfort and frame stress.
- Punctures or scraping marks: Sharp gouges on patio decks or small tears in storage bags indicate that the foot material has worn down to a sharp edge.
Comparing Types of Replacement Feet
Replacement feet come in various materials and design styles, each suited to different outdoor conditions and chair configurations.
Rubber Feet
Rubber feet offer high flexibility and good shock absorption. They provide excellent anti-slip grip on hard or slick surfaces like rock, tile, and wood. Thick-walled rubber caps stretch slightly over leg ends for a tight fit and resist puncturing from hollow metal tubing.
Plastic Feet
Molded plastic caps, often made from durable polymers or PVC, are lightweight, rigid, and economical. They excel on dry lawns, dirt, and flat patio surfaces. While less flexible than rubber, plastic feet are highly resistant to moisture and provide smooth, durable surface contact.
Metal Feet
Metal replacement feet, typically crafted from aluminum or steel alloys, are made for heavy-duty use and long service life. They are often paired with rubber pads or internal threaded stems, making them a good choice for rugged, rocky environments where softer materials might wear away quickly.
Clip-On and Wide-Foot Styles
Clip-on and wide-disc feet feature an expanded base area connected by clip mechanisms or curved arms that snap directly onto chair frame legs. A wider base spreads the load over a larger area, which helps on soft mud, loose sand, and snow.
Comparison of Chair Foot Materials and Styles
| Foot Type / Material | Ideal Terrain and Use Case | Primary Advantages | Key Considerations |
|---|---|---|---|
| Rubber Caps | Slick rock, wooden decks, wet grass, flat ground | Superior anti-slip grip, flexible fit, high durability | Can wear faster on sharp, highly abrasive gravel |
| Plastic Caps | General campsites, lawns, patio decks | Lightweight, affordable, moisture-resistant | Less grip on smooth, wet surfaces; rigid fit |
| Metal Feet | Rugged, rocky, or extreme heavy-use conditions | Exceptional strength, long lifespan | Heavier weight; requires protective pads for tent floors |
| Clip-On Wide Feet | Mud, soft soil, sand, snow | Prevents sinking; multiplies contact footprint | Bulkier to pack; designed for specific leg diameters |

How to Measure and Choose the Right Size and Fit
Finding replacement feet that stay firmly in place requires careful measurement. Buying a cap that is slightly too large results in lost feet in the mud, while a cap that is too small will fail to slide onto the leg.
External Caps vs. Internal Plugs
First, determine how the foot attaches to your chair frame. External caps slide over the outside wall of the chair leg, so you must measure the outer diameter of the leg tube. Internal plugs push inside the hollow opening of the leg tube, so you must measure the inner diameter of the leg opening.
Identifying Leg Geometry
Examine the shape of the leg tubing. Round legs require standard round cup-style caps, while square or rectangular legs require matching square caps. Forcing a round cap onto a square tube creates high stress at the corners, causing the material to split quickly.
Step-by-Step Sizing Method
- Use precision tools: Vernier or digital calipers are the most reliable tool for measuring small leg diameters. Slide the caliper jaws across the outer edges for external caps, or expand the top jaws inside the tube for internal plugs.
- Alternative ruler method: If calipers are unavailable, place a rigid metal ruler flat across the center of the leg opening. Avoid flexible cloth tapes or sagging tape measures, as slight stretching distorts readings.
- Circumference calculation: For round legs, you can wrap a flexible measuring tape around the outside of the tube to measure the total circumference, then divide that number by 3.1416 (pi) to calculate the outer diameter.
- Check tube wall thickness and depth: For internal inserts, measure the wall thickness and verify internal depth using a straight wire or depth gauge to ensure the insert clears internal rivets, screws, or welds.
Sizing must always be evaluated as a general measurement method. Measure your chair legs carefully and cross-reference your figures with the manufacturer’s provided sizing guides. Always check compatibility with your specific chair model before purchasing. Flexible rubber caps offer slight stretch tolerance for snug fits, whereas rigid plastic components require exact matching.
Quick Checklist for Choosing Replacements
Before ordering replacement feet, review this quick checklist:
- Identified attachment style (external cap vs. internal plug)?
- Confirmed leg geometry (round, square, or rectangular)?
- Measured exact outer diameter or inner diameter using calipers or a rigid ruler?
- Verified terrain requirements (anti-slip rubber vs. wide mud protection)?
- Checked manufacturer sizing guide and model compatibility?
Where to Find Replacement Feet
Replacement feet are widely available across several retail channels:
- Specialty outdoor stores: Gear outfitters carry replacement caps and wide-foot adapters designed for camping furniture.
- Hardware stores and home centers: Local hardware shops stock heavy-duty rubber tips, crutch caps, and tubing plugs that function well on folding chairs.
- Online marketplaces: E-commerce platforms offer bulk packs of rubber and plastic caps in a range of sizes.
- Original equipment manufacturers: Contacting your chair’s manufacturer directly is often the best path for sourcing exact factory replacement parts.
Step-by-Step Guide to Replacing Chair Feet
Replacing damaged chair feet is a quick DIY repair that requires basic tools and minimal effort.
Tools needed: Screwdriver or pliers (for removing stubborn feet); container of hot water; rubber mallet or small hammer; clean rag and mild soap solution.
- Step 1: Inspect the frame. Turn the chair upside down on a stable workbench or clean ground. Inspect the metal or plastic frame around each foot for cracks, rust, or bends. Resolve any structural frame issues before installing new feet.
- Step 2: Remove old feet. Twist and pull the worn or damaged feet off the leg ends. If a foot is stuck or glued, carefully work a flathead screwdriver under the rim or use pliers to twist it free. Remove any mounting screws or mechanical fasteners if present.
- Step 3: Clean the tube ends. Wipe away dirt, mud, rust flakes, and old adhesive from the end of the chair legs using a damp rag and mild soap. A clean, smooth mounting surface allows new caps to seat properly.
- Step 4: Install new feet (hot water method). If you are installing snug rubber or PVC caps, drop them into a container of hot water for two to three minutes. The heat softens the material, making it pliable and much easier to push over the leg tubing. Push and twist the softened foot firmly onto the leg end. If necessary, tap the bottom of the foot gently with a rubber mallet until it rests completely flush against the frame.
- Step 5: Test for stability. Set the chair upright on a flat surface. Sit down carefully, applying weight evenly to test for balance, wobble, and secure attachment. Verify that all four feet sit level on the ground.

Simple Care Tips to Extend Foot Lifespan
Taking simple care of your chair feet prolongs their service life and keeps your seating stable for many camping trips:
- Clean after outings: Rinse away mud, sand, and road salt with fresh water after every trip to prevent grit from degrading the material.
- Avoid abrasive dragging: Lift your chair when moving it across sharp gravel, concrete, or asphalt instead of dragging it under load.
- Protect from extreme heat and UV: Store chairs in a cool, dry space away from direct sunlight, which degrades rubber and makes plastic brittle over time.
- Inspect before trips: Perform a quick check of all four feet before heading out on long outdoor adventures.
- Pack extra spares: Keep a small spare set of rubber caps in your camping gear bag for emergency field repairs.
Key Takeaways
- Functional chair feet distribute weight, prevent sinking, and provide anti-slip traction on uneven terrain.
- Check regularly for cracks, uneven wear, or exposed metal tubing to catch problems before frame damage occurs.
- Match the foot type (rubber, plastic, metal, or wide clip-on) to your primary camping terrain and load requirements.
- Measure outer leg diameter for external caps and inner diameter for internal plugs using calipers or a rigid ruler.
- Soaking rubber or vinyl caps in hot water makes installation easier and helps ensure a tight, secure fit.
Conclusion and Next Steps
Giving your camping chair a quick foot replacement is one of the easiest ways to revamp your outdoor gear, save money, and ensure a stable seat around the campfire. With properly fitted feet, you can relax comfortably without worrying about sinking into the mud or damaging your tent floor.
Before your next outdoor trip, take a moment to turn your camping chairs upside down and check the condition of their feet. Grab a caliper or rigid ruler, measure your chair leg tubing, and order a fresh set of replacement caps so your gear is ready for your next adventure under the stars.

Hi, I am Emam Hasan — founder and editor of BrokeMountain. I oversee this blog’s hiking, camping and outdoor gear guides, making sure every article is well-researched, accurate and genuinely helpful for your time on the trail. Enjoy it!